Run an App
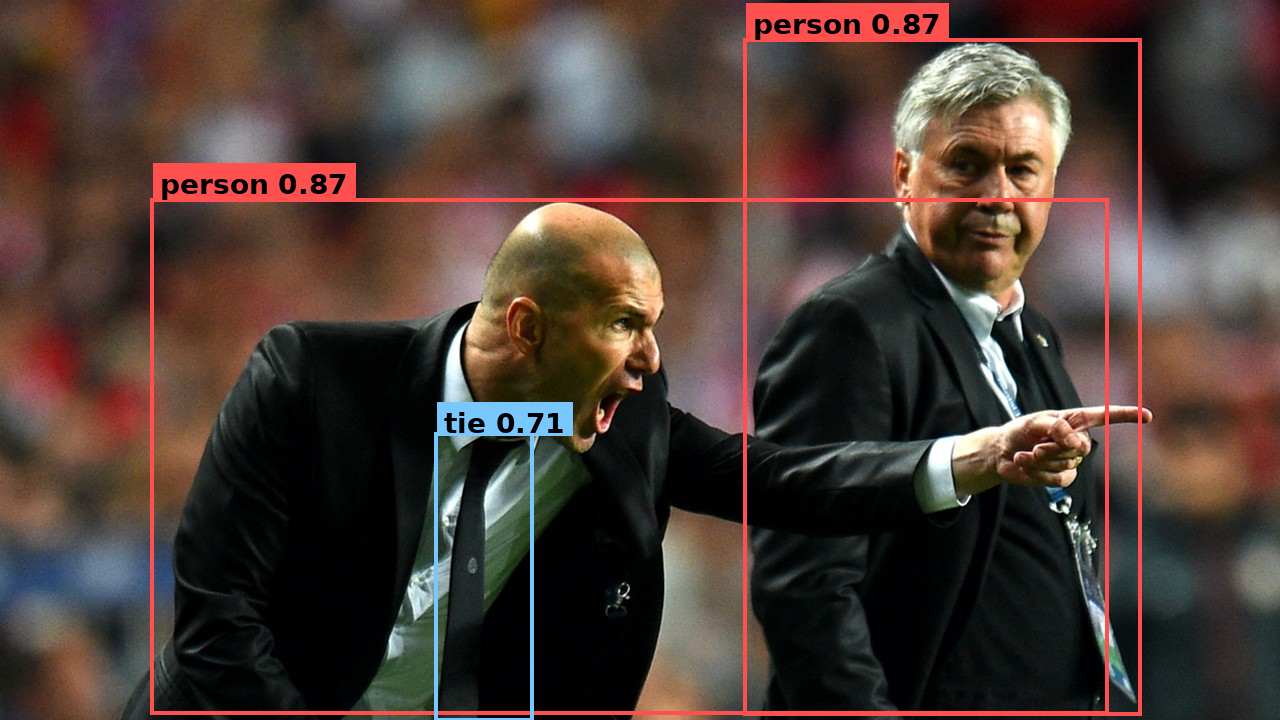
Detections written by the program below, drawn on the source image.
This is the same YOLOv8 inference as a small application: instead of calling Model.run(...) directly, you compose the model into a Graph — a named pipeline with an input, the model, and an output — then build it and push/pull. Same program in Python and C++; pick a language tab on each code block.
For this first app the shape is intentionally simple:
- A named input (
nodes.input("image")) marks where data enters the app. - A model (
graph.add(model)) runs the model as one step in the pipeline. - A named output (
nodes.output("detections")) marks where your application reads the result.

The same API scales to much more complex applications later; here the goal is the core composition pattern.
Use the Python / C++ tabs on any code block — your choice follows the site-wide language selector, so every snippet and the full program switch together.
Set up the project
-
Create an assets directory for the model and the input image:
mkdir -p assets -
Download the model:
sima-cli modelzoo -v 2.0.0 get yolo_v8ssima-cli model downloadIf
sima-cliwrites the model somewhere other than theassetsdirectory, copy that file intoassets/yolo_v8s_mpk.tar.gz. -
Download the sample image:
curl -L -o assets/tutorial_sample_image.png \https://docs.sima-neat.com/images/tutorial_sample_image.pngYou can also open or download the sample image from the docs.
Walk through the code
The program is eight short pieces. Switch the language tab on each block.
1. Read the image
#include <opencv2/opencv.hpp>

cv::Mat bgr = cv::imread("assets/tutorial_sample_image.png");
cv::Mat rgb;
cv::cvtColor(bgr, rgb, cv::COLOR_BGR2RGB);
OpenCV reads BGR; YOLOv8 expects RGB. This step is not Neat — your application gets pixels from a file, camera, or decoder; Neat enters at the next step.
2. Describe the pipeline
#include <neat.h>
namespace neat = simaai::neat;

neat::Model::Options opt;
opt.preprocess.kind   = neat::InputKind::Image;
opt.preprocess.preset = neat::NormalizePreset::COCO_YOLO;
opt.decode_type       = neat::BoxDecodeType::YoloV8;
opt.score_threshold   = 0.25f;
opt.nms_iou_threshold = 0.45f;
opt.top_k             = 100;
ModelOptions declares the whole shape of the model pipeline in one object — how the input is preprocessed and how the detector output is decoded.
| Field | What it sets |
|---|---|
preprocess.kind = Image | Input is raw pixels, not a pre-shaped tensor. |
preprocess.preset = COCO_YOLO | Resize + letterbox to model input, RGB, scale by 1/255, no mean subtraction. |
decode_type = YoloV8 | Detection-head decoder family. |
score_threshold / nms_iou_threshold / top_k | Confidence floor, NMS overlap, and max boxes kept. |
3. Load the model
neat::Model model("assets/yolo_v8s_mpk.tar.gz", opt);
Model reads the .tar.gz, validates its MPK contract against the ModelOptions you passed, and instantiates the model fragment. Nothing has run yet.
4. Wrap your image as a Tensor
neat::Tensor input = neat::from_cv_mat(rgb, neat::ImageSpec::PixelFormat::RGB);
Tensor is Neat's typed data container — shape, dtype, layout, and the pixel format the framework needs to interpret the bytes. Passing the PixelFormat is required so Neat knows the layout, not just the bytes.
5. Compose the Graph
neat::Graph graph("hello_neat_app");
graph.add(neat::nodes::Input("image"));
graph.add(model);
graph.add(neat::nodes::Output("detections"));
A Graph is the application pipeline. Each add(...) appends the next step, so this builds the linear flow image → model → detections. The model fragment from step 3 becomes one step inside it.
6. Build and run the Graph
neat::Run run = graph.build();
run.push("image", neat::TensorList{input});
neat::TensorList outputs = run.pull_tensors("detections");
build() lowers the public graph into one executable runtime graph, preserving your node names. You then push inputs into named inputs and pull results from named outputs. pull_tensors returns a TensorList — the same shape Model.run would have produced — here the packed YOLOv8 BBOX output.
7. Decode the boxes
neat::TensorList decoded = neat::decode_bbox(outputs);
decode_bbox is a TensorList → TensorList transform, positional 1:1. Each decoded output is a float32 tensor of shape [num_detections, 6] with columns (x1, y1, x2, y2, score, class_id).
8. Read the boxes
const neat::Tensor& boxes = decoded.front();      // [num_detections, 6] float32
auto m = boxes.storage->map(neat::MapMode::Read);
const float* d = static_cast<const float*>(m.data);
for (int64_t i = 0; i < boxes.shape[0]; ++i) {
  const float* r = d + i * 6;                     // x1 y1 x2 y2 score class_id
  const int cls = static_cast<int>(r[5]);
  const char* name = (cls == 0) ? "person" : (cls == 27) ? "tie" : "?";
  std::printf("%-8s %.2f  [%4.0f %4.0f %4.0f %4.0f]\n", name, r[4], r[0], r[1], r[2], r[3]);
}
In Python the decoded tensor reads as an [N, 6] NumPy array via to_numpy(). In C++ you map the tensor and read the floats. The model emits COCO class IDs; mapping them to display names is on the application.
Full program
Create the files in your project directory, then build and run.
Create CMakeLists.txt and main.cpp:
cmake_minimum_required(VERSION 3.16)
project(sima_neat_app LANGUAGES CXX)

set(CMAKE_CXX_STANDARD 20)
set(CMAKE_CXX_STANDARD_REQUIRED ON)
set(CMAKE_CXX_EXTENSIONS OFF)

# Supports both DevKit/native installs (system paths) and
# cross builds with SYSROOT exported (SDK sysroot paths).
if(DEFINED ENV{SYSROOT} AND NOT "$ENV{SYSROOT}" STREQUAL "")
  list(APPEND CMAKE_PREFIX_PATH
    "$ENV{SYSROOT}/usr"
    "$ENV{SYSROOT}/usr/lib"
    "$ENV{SYSROOT}/usr/lib/aarch64-linux-gnu"
  )
endif()

find_package(SimaNeat REQUIRED CONFIG)
find_package(PkgConfig REQUIRED)
pkg_check_modules(OPENCV REQUIRED IMPORTED_TARGET opencv4)

add_executable(sima_neat_app main.cpp)
target_link_libraries(sima_neat_app
  PRIVATE
    SimaNeat::sima_neat
    PkgConfig::OPENCV
)
#include "neat.h"

#include <opencv2/imgcodecs.hpp>
#include <opencv2/imgproc.hpp>

#include <cstdint>
#include <cstdio>
#include <stdexcept>

namespace neat = simaai::neat;

neat::Model::Options yolo_model_options() {
  neat::Model::Options opt;
  opt.preprocess.kind   = neat::InputKind::Image;
  opt.preprocess.preset = neat::NormalizePreset::COCO_YOLO;
  opt.decode_type       = neat::BoxDecodeType::YoloV8;
  opt.score_threshold   = 0.25f;
  opt.nms_iou_threshold = 0.45f;
  opt.top_k             = 100;
  return opt;
}

int main() {
  cv::Mat bgr = cv::imread("assets/tutorial_sample_image.png");
  if (bgr.empty())
    throw std::runtime_error("failed to read assets/tutorial_sample_image.png");
  cv::Mat rgb;
  cv::cvtColor(bgr, rgb, cv::COLOR_BGR2RGB);

  neat::Model model("assets/yolo_v8s_mpk.tar.gz", yolo_model_options());
  neat::Tensor input = neat::from_cv_mat(rgb, neat::ImageSpec::PixelFormat::RGB);

  // Compose the model into a Graph application: image -> model -> detections.
  neat::Graph graph("hello_neat_app");
  graph.add(neat::nodes::Input("image"));
  graph.add(model);
  graph.add(neat::nodes::Output("detections"));

  // Build the app, push the image into the named input, pull the named output.
  neat::Run run = graph.build();
  run.push("image", neat::TensorList{input});
  neat::TensorList outputs = run.pull_tensors("detections");

  neat::TensorList decoded = neat::decode_bbox(outputs);
  const neat::Tensor& boxes = decoded.front();      // [num_detections, 6] float32
  auto m = boxes.storage->map(neat::MapMode::Read);
  const float* d = static_cast<const float*>(m.data);
  for (int64_t i = 0; i < boxes.shape[0]; ++i) {
    const float* r = d + i * 6;                     // x1 y1 x2 y2 score class_id
    const int cls = static_cast<int>(r[5]);
    const char* name = (cls == 0) ? "person" : (cls == 27) ? "tie" : "?";
    std::printf("%-8s %.2f  [%4.0f %4.0f %4.0f %4.0f]\n", name, r[4], r[0], r[1], r[2], r[3]);
  }
  std::printf("[OK] Graph app completed\n");
  return 0;
}
Build:
cmake -S . -B build -DCMAKE_BUILD_TYPE=Release
cmake --build build -j
Run:
- On the DevKit
./build/sima_neat_app
- On the Neat SDK from host
dk build/sima_neat_app
You should see one line per detection, then:
[OK] Graph app completed
What Neat assembled

The APIs map directly to that shape:
Graphholds the application pipeline;graph.add(...)appends each step in order.- The named input and output become the runtime endpoints:
run.push("image", ...)andrun.pull_tensors("detections"). Modelis the same fragment you would call directly withModel.run; here it runs as one node inside the app.
Next steps
For deeper graph composition, continue with the Graph programming model.
From there, continue with broader SiMa Neat learning resources:
- Learn the core programming model, which explains the main Neat concepts such as graphs, models, pipeline stages, and graph execution.
- Follow the tutorials, which walk through specific concepts and workflows step by step.
- Explore curated applications on the apps portal, with source code in the apps repository on GitHub.